Smoked Beef Brisket

Smoked Beef Brisket

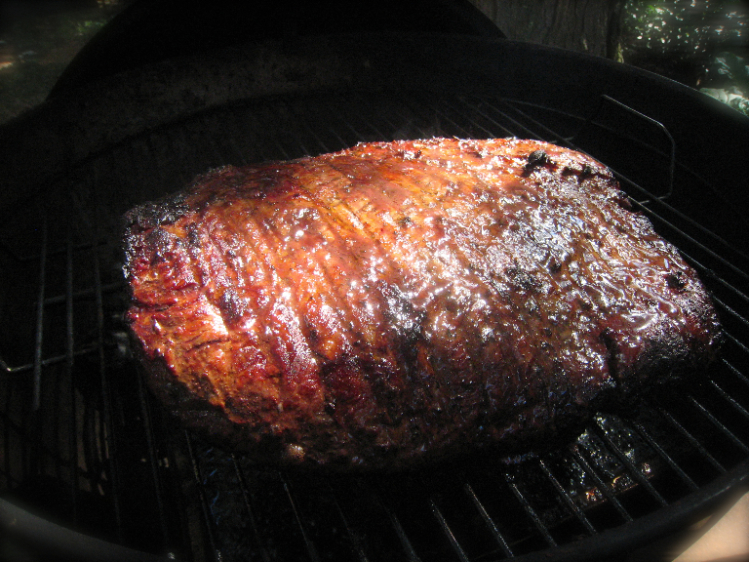
There are several cuts of meat that are almost synonymous with “barbecue” depending on region. In Texas, they’re known for brisket. Considered by some to be “The Mount Everest of Barbecue,” this was the last of the large cuts that I was determined to cook this Summer. As it turned out, we sat down to Sunday Dinner just as Autumn rolled in for 2013.

I prepared the 7.5 pound flat-cut brisket on Saturday evening, salting it, slathering yellow mustard and Worcestershire Sauce on it and then applying a homemade rub of 2 t paprika, 1 t black pepper, 1 T turbinado sugar, 1 t cumin, 1 t garlic powder, 1 t onion powder, 1 t nutmeg and 1t Herbs de Provence. Come Sunday morning I removed it from the refrigerator and set up the Weber Kettle, putting a foil drip pan full of water on one side of the charcoal rack and spreading a chimney full of unlit charcoal on the other side. I then lit about a third of a chimney of additional coals, and poured them on top of the unlit ones, adding some Hickory and Cherry chunks for smoke.

Once the grill was up to temperature, I put the brisket on over the drip pan, fat side up. Using a dual probe thermometer I received for my birthday, I did my best to keep the temperature in the grill to around 250 F, adjusting the vents as needed during four hours of cooking. Every hour or so, I sprayed the brisket with equal parts brewed coffee, dark beer, apple juice and cider vinegar. I also rotated and turned the meat to ensure even cooking. After four hours the meat was measuring 160 degrees, so I pulled it off, wrapped it in foil and put it in the gas grill on indirect heat (again, at 250) to finish. After another hour-and-a-half, the meat had risen to 195 degrees and was ready to come off. We let it rest inside the foil for another hour prior to serving.

It turned out moist and flavorful, though at this point I made a rookie mistake, cutting it with the grain to serve it. My wife noticed this later as she removed the fat cap to store the rest of the brisket. The part that she carved against the grain was much more tender to chew. She poured the juices that we had reserved from the foil packet over the leftovers. The beef was still delicious today for lunch.

We served the beef with grilled asparagus, and a wonderful green bean & red potato salad with Dijon dressing that she made.

Other than proper carving, next time I would use more smoke, more pepper and more salt. Also, I think I might be tempted to cook it just a bit longer in the foil to get it “melt in your mouth” tender. This was good for a first attempt though, and I wouldn’t be intimidated to cook this cut again.

Pork Loin Char Siu

Pork Loin Char Siu

My Mother-In-Law had brought me a nice pork loin awhile back for cooking on the rotisserie, and this past week we decided to get it out of the deep freeze and cook it for Sunday dinner. I began researching recipes and ran across several for Char Siu, which is a Chinese pork barbecue. The literal translation is “fork roast” meaning roasted on a skewer. This sounded like just what I was after.

After a little refined searching, I found Trader Vic’s recipe for the dish. Although obviously Americanized (the marinade includes ketchup), it seemed easy enough to prepare with ingredients that were readily available to me, and recipes from Vic’s have always pleased my palate in the past.

The loin was about 5 3/4 pounds, so the first problem that presented itself was that I didn’t have anything large enough to marinate it in. I had seen in one of my reference books (Weber’s Way To Grill) that you can tie two pieces of loin together with butcher’s twine to make a properly sized roast for the rotisserie, so I cut the pork in half, removed much of the fat cap, and placed it in a gallon ziplock bag with equal parts ketchup, sugar, Soy Sauce and Hoisin (about half a cup of each). It marinated in the refrigerator overnight.

About an hour before cooking, I removed it from the fridge, trussed it together with the fat toward the outside and put it on the skewer, taking care to get the tines into both pieces of the roast. I cooked it over indirect high heat on the Weber Kettle with some Hickory chips on the charcoal.

Char Siu on Rotisserie

After about 50 minutes, it was getting close to 140 degrees (my target temperature was 140-150). At this point I removed it from the rotisserie, cut off the twine, and placed it fat side down in a 9×13 pan on the gas grill over indirect medium-high heat (about 450). I kept a close eye on the probe thermometer, and when the internal temperature of the meat topped 140, I removed it and brought it in to rest at room temperature. I toasted some sesame seeds and sprinkled them over the top of the roasts as a finishing touch.

We served this with mustard and sweet/sour sauce as condiments, with awesome garlic mashed potatoes and sweet corn that my wife had prepared as side dishes. She said later that it was the best pork she’d ever tasted in her life.

The flavor was quite a bit more subdued than I had anticipated. It was just sweet enough and just savory enough, with none of the strong flavors in the marinade overpowering the dish. The meat was perfectly done, juicy and tender. This is definitely a recipe that I’ll make time and again.

Shrimp Ceviche and Quesadillas

Shrimp Ceviche and Quesadillas

I’ll be honest. The only part of this dish that was done on the grill was the quesadillas, but I had to share the photo anyway.

I fixed this last Friday evening and it truly was delicious. Here are the ingredients.

Ceviche

  • About a Pound of Small Cooked Shrimp
  • 1/2 Cup of Fresh Squeezed Lime Juice
  • 1/2 Cup of Fresh Squeezed Lemon Juice
  • 1/2 Red Onion, Finely Diced
  • 1 Cup of Chopped Fresh Seeded Tomatoes
  • 1 Serrano Chili, Seeded and Finely Diced
  • 2 Teaspoons of Salt
  • Dash of Ground Oregano
  • Chopped Cilantro
  • Diced Avocado

Just mix all of that together in a big glass bowl and let it cool in the refrigerator for an hour or so. Although ceviche is traditionally made with raw seafood, the taste and texture of the shrimp was just right, and the dish was perfectly balanced — bright, fresh-tasting, savory.

The quesadillas were dead easy too. I simply sandwiched some shredded Mexi-cheese between two flour tortillas and grilled the for a few minutes over low heat.

This is definitely a meal that we’ll keep in mind, particularly for warm weather when we want something light and tasty.

Farsi Chicken on the Grill

farsi-chicken

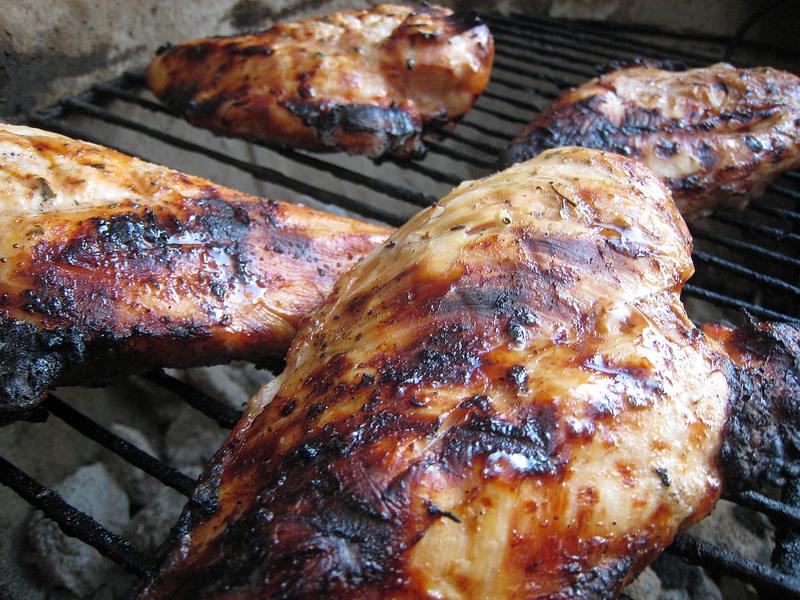
This is an incredibly simple recipe that turns out delicious, succulent chicken.

1) Soak chicken pieces in fresh lemon juice for half-an-hour or so.

2) Blot the chicken dry and marinate overnight in plain yogurt.

3) Wipe off the chicken, season lightly with salt and pepper, grill until done.

That’s it.

How To Make Pizza On The Grill

pizza-on-the-grill

There’s truly nothing much tastier than pizza that’s been cooked on a grill, and there’s also nothing much simpler to prepare that can yield such a variety of styles and flavors. I first made pizza on a grill a couple years ago. It was fine, but honestly, the process was pretty arduous. After further research and a lot of trial (and error) I think I’ve found a foolproof process for turning out consistently outstanding pizza.

Choose your dough wisely. My early efforts at pizza on the grill involved boxed dough mixes. They work, but there was a lot of time and effort involved, and the results weren’t as tasty or as crunchy as I’d have liked.

I would recommend that you get friendly with the folks at a local pizzeria, and see if they’ll sell you a big ball of dough. If you’re a good customer and explain what you’re wanting to do with it, chances are you may even end up with enough dough for several grilled pizzas for free. At least, that’s what happened to me.

I would also highly recommend the basic pizza dough recipe from the authors of Artisan Bread in 5 Minutes a Day. Once you learn their method, you can mix up a batch in just a few minutes with very little effort. The dough will make five or six nice sized pizzas and will keep in the refrigerator for a couple weeks if you’re not doing them all at one time.

Use Parchment Paper! Initially I tried putting my dough on a pizza peel and sliding it off onto the grill, but I found that with thinner crusts this method results in a glommy mess instead of a nice crust. Nowadays (since my wife prefers thin crust) I stretch or roll my dough out on a sheet of parchment paper. It’s relatively easy to get it upside down on the grill with the dough still in decent shape. After thirty seconds or so, the paper peels right off, leaving you with a tidy crust.

Pre-cook whatever needs it. The simplest way to cook pizza on a grill involves baking the dough, then topping it, and then returning it to the grill to finish. You won’t want to overcook the crust, so any toppings that need much cooking should be mostly done ahead of time. Uncooked meats or any other toppings that you wouldn’t want to eat raw (onions, in my case) should be done to the point that they can be finished with indirect heat in two or three minutes.

Having mentioned all of that, here’s my step-by-step process when it’s time to grill.

Step 1: Stretch your dough. I get a ball of dough a little bigger than a softball and let it rest at room temperature for a bit. I flour the parchment paper, set on the dough ball and flour it. I like to use a French Rolling Pin to flatten out my dough, but some people have luck simply stretching it out from the center with their fingertips, or even (God help us) tossing it in the air to stretch. This looks like fun, but I’ll leave it to more adventurous souls than me. I find that I can get the dough to an even 1/8″ thickness that is nearly round by using the pin.

Step 2: Oil it. I use a blast or two of spray oil on the top on my dough once I have it rolled out on the parchment. Either olive or canola has worked fine for me. I think the olive may add a little more flavor. The lower smoke point doesn’t matter, because you’ll be watching the bake pretty closely anyway. Just don’t oversaturate the dough with oil. A little bit does the trick.

Step 3: Have your grill hot. I’ll preheat my grill on high for about ten minutes before I’m ready to start cooking, clean the grates with a wire brush, and then back the heat down to medium/high. On my Weber Genesis, this means all three main burners on full during warm up, then turned down half way when it’s time to cook.

Step 4: Cook the top first. When you’re ready to put your dough on the grill, aim, “commit and flip” as they say. You don’t need a pizza stone or griddle or anything of the sort. Just get the dough down on the grill, directly over the heat, as quickly as you can and get the lid closed. About thirty seconds later, open the lid and use your tongs to tug gently at the edge of the parchment. If it pulls up easily remove it. If it’s being stubborn, close the lid for a little while longer and then try again. You’ll want to keep an eye on the crust as it bakes, checking every half-minute or minute. Use your tongs to lift up one of the edges. When the crust releases easily from the grill and you’re able to lift it with your tongs, rotate it about a quarter turn so that if there are any hot spots it cooks more evenly. Total cooking time on this side will likely be around 5 or 6 minutes. At this point you can flip the crust over, and let it cook a minute or two on the other side. Remove it from the grill after this. The side that you cooked first is the one where the toppings go.

Step 5: Finish it indirect. I usually cook several pizzas when I’m grilling them, and it works best for me to do one crust at a time, and then when they’re all finished, top them and cook each pizza on its own. So for this part, I turn off my middle burner, put the topped pizza in the center of the grill, and let convection warm everything up. The grill grates will remain hot enough to finish the bottom of the crust, but it’s less likely to get overly charred. Also, this method gives all of the gooey topping goodness time to melt together and finish cooking (if there’s any need for that). Five minutes is the longest I’ve needed to cook a pie at this final step, but it may take considerably less.

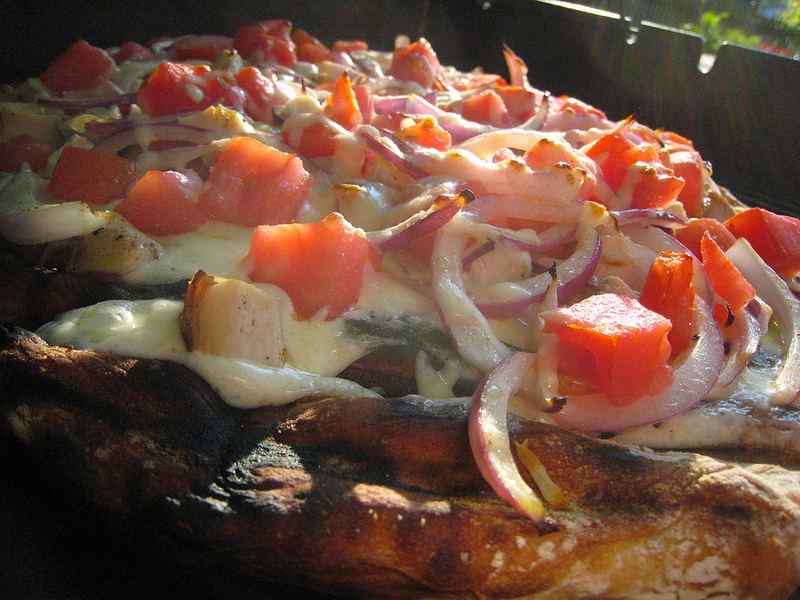
The pizza shown at the top of this post is a chicken and ranch dressing pizza we made a few weeks ago. It had a little thicker crust than I like to make now, but it was incredibly delicious. I left off the tomato sauce altogether and topped the pizza with shredded mozzarella cheese, diced tomatoes, cubed grilled chicken, ranch dressing and some seasonings (salt, pepper, oregano).

Really though, you can use just about anything for topping. My favorite is a pizza with a nice thin layer of sauce, some shredded Italian cheeses, and a rosemary-based seasoning that we usually use for olive oil dipping sauce. Hard to believe that something as simple as that can taste as good as it does.

Believe me, once you get this process down you’ll be hooked. In the time it would take for your order to arrive from one of those cardboard pizza chains, you can be feasting on a proper pie that will put their product to shame. All it takes is a grill, a little preparation and a box of parchment paper.