There’s truly nothing much tastier than pizza that’s been cooked on a grill, and there’s also nothing much simpler to prepare that can yield such a variety of styles and flavors. I first made pizza on a grill a couple years ago. It was fine, but honestly, the process was pretty arduous. After further research and a lot of trial (and error) I think I’ve found a foolproof process for turning out consistently outstanding pizza.
Choose your dough wisely. My early efforts at pizza on the grill involved boxed dough mixes. They work, but there was a lot of time and effort involved, and the results weren’t as tasty or as crunchy as I’d have liked.
I would recommend that you get friendly with the folks at a local pizzeria, and see if they’ll sell you a big ball of dough. If you’re a good customer and explain what you’re wanting to do with it, chances are you may even end up with enough dough for several grilled pizzas for free. At least, that’s what happened to me.
I would also highly recommend the basic pizza dough recipe from the authors of Artisan Bread in 5 Minutes a Day. Once you learn their method, you can mix up a batch in just a few minutes with very little effort. The dough will make five or six nice sized pizzas and will keep in the refrigerator for a couple weeks if you’re not doing them all at one time.
Use Parchment Paper! Initially I tried putting my dough on a pizza peel and sliding it off onto the grill, but I found that with thinner crusts this method results in a glommy mess instead of a nice crust. Nowadays (since my wife prefers thin crust) I stretch or roll my dough out on a sheet of parchment paper. It’s relatively easy to get it upside down on the grill with the dough still in decent shape. After thirty seconds or so, the paper peels right off, leaving you with a tidy crust.
Pre-cook whatever needs it. The simplest way to cook pizza on a grill involves baking the dough, then topping it, and then returning it to the grill to finish. You won’t want to overcook the crust, so any toppings that need much cooking should be mostly done ahead of time. Uncooked meats or any other toppings that you wouldn’t want to eat raw (onions, in my case) should be done to the point that they can be finished with indirect heat in two or three minutes.
Having mentioned all of that, here’s my step-by-step process when it’s time to grill.
Step 1: Stretch your dough. I get a ball of dough a little bigger than a softball and let it rest at room temperature for a bit. I flour the parchment paper, set on the dough ball and flour it. I like to use a French Rolling Pin to flatten out my dough, but some people have luck simply stretching it out from the center with their fingertips, or even (God help us) tossing it in the air to stretch. This looks like fun, but I’ll leave it to more adventurous souls than me. I find that I can get the dough to an even 1/8″ thickness that is nearly round by using the pin.
Step 2: Oil it. I use a blast or two of spray oil on the top on my dough once I have it rolled out on the parchment. Either olive or canola has worked fine for me. I think the olive may add a little more flavor. The lower smoke point doesn’t matter, because you’ll be watching the bake pretty closely anyway. Just don’t oversaturate the dough with oil. A little bit does the trick.
Step 3: Have your grill hot. I’ll preheat my grill on high for about ten minutes before I’m ready to start cooking, clean the grates with a wire brush, and then back the heat down to medium/high. On my Weber Genesis, this means all three main burners on full during warm up, then turned down half way when it’s time to cook.
Step 4: Cook the top first. When you’re ready to put your dough on the grill, aim, “commit and flip” as they say. You don’t need a pizza stone or griddle or anything of the sort. Just get the dough down on the grill, directly over the heat, as quickly as you can and get the lid closed. About thirty seconds later, open the lid and use your tongs to tug gently at the edge of the parchment. If it pulls up easily remove it. If it’s being stubborn, close the lid for a little while longer and then try again. You’ll want to keep an eye on the crust as it bakes, checking every half-minute or minute. Use your tongs to lift up one of the edges. When the crust releases easily from the grill and you’re able to lift it with your tongs, rotate it about a quarter turn so that if there are any hot spots it cooks more evenly. Total cooking time on this side will likely be around 5 or 6 minutes. At this point you can flip the crust over, and let it cook a minute or two on the other side. Remove it from the grill after this. The side that you cooked first is the one where the toppings go.
Step 5: Finish it indirect. I usually cook several pizzas when I’m grilling them, and it works best for me to do one crust at a time, and then when they’re all finished, top them and cook each pizza on its own. So for this part, I turn off my middle burner, put the topped pizza in the center of the grill, and let convection warm everything up. The grill grates will remain hot enough to finish the bottom of the crust, but it’s less likely to get overly charred. Also, this method gives all of the gooey topping goodness time to melt together and finish cooking (if there’s any need for that). Five minutes is the longest I’ve needed to cook a pie at this final step, but it may take considerably less.
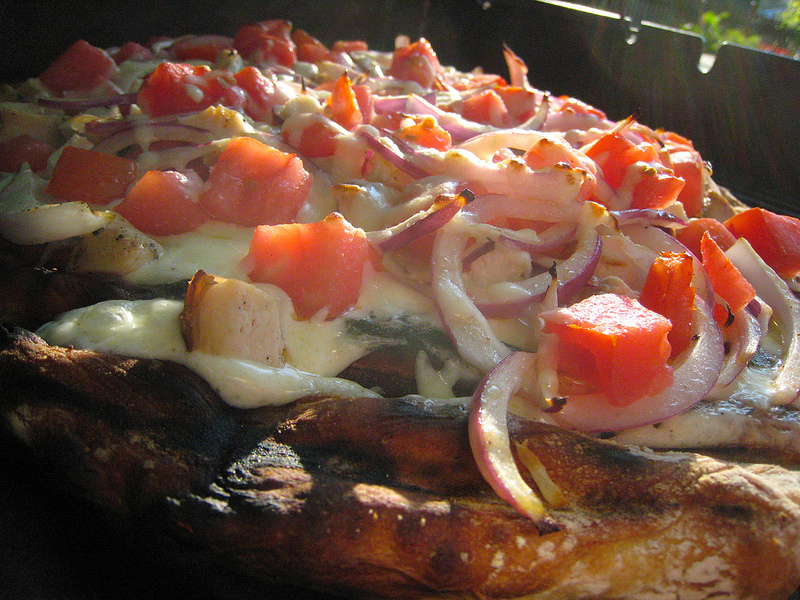
The pizza shown at the top of this post is a chicken and ranch dressing pizza we made a few weeks ago. It had a little thicker crust than I like to make now, but it was incredibly delicious. I left off the tomato sauce altogether and topped the pizza with shredded mozzarella cheese, diced tomatoes, cubed grilled chicken, ranch dressing and some seasonings (salt, pepper, oregano).
Really though, you can use just about anything for topping. My favorite is a pizza with a nice thin layer of sauce, some shredded Italian cheeses, and a rosemary-based seasoning that we usually use for olive oil dipping sauce. Hard to believe that something as simple as that can taste as good as it does.
Believe me, once you get this process down you’ll be hooked. In the time it would take for your order to arrive from one of those cardboard pizza chains, you can be feasting on a proper pie that will put their product to shame. All it takes is a grill, a little preparation and a box of parchment paper.