-
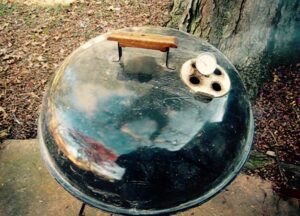
- Smoke From the Kettle
-
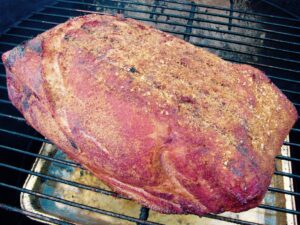
- Pork Roast on the Grate
For Sunday Dinner this week, we thawed a 5 1/2 pound pork shoulder roast and smoked it.
I used the same rub as usual, but varied the process a little this time. It turned out much easier to maintain a constant temperature between 200 and 250 F.
I put ten unlit charcoal briquettes on each side of a drip pan filled 3/4 with water. Then I lit six briquettes, and put three on each side, along with some apple and hickory chunks. One bottom vent was completely closed, another was about half way open and the third was slightly open. The top vent was wide open this time. I checked the roast every hour, turning it over each time and spraying it with a mop of apple juice, cider vinegar and brewed coffee. I also added some unlit coals and a couple more chunks of wood after about two hours.
After four hours, it was up to around 130 F at the center. I wrapped it tightly in foil and put it on the gas grill over indirect low-medium heat. After another couple hours it was between 195 and 200, and ready to come off and rest for an hour before serving.
This turned out really tender, but not quite as flavorful as usual. I think this was because the roast wasn’t completely thawed until morning on the day of the cook, so I didn’t get a chance to rub it down the day before. It still had a decent bark, but needed some sauce to kick it up a little.
We served it on buns with mustard potato salad, tangy slaw, bean salad and pasta salad as sides. I’d picked up a bottle of J. Lohr Seven Oaks Cabernet Sauvignon (on a great sale – only $13) and it paired well with the meal.
I’ve been wanting a Weber Smokey Mountain water smoker for quite awhile, but I’m beginning to think that it’s really not necessary. I’ll be tempted to try a beef brisket again before long.