-
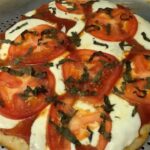
- Pizza Margherita
-

- Veggie Pizza
-
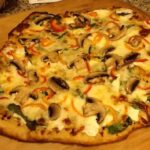
- White Pizza
I’ve learned a lot since originally posting about how to make pizza on the grill. I think I finally have a foolproof process that can consistently turn out great pies.
One of the most labor intensive parts of the process, for me, has been rolling out and stretching the dough. This time around, I put each dough ball between two sheets of parchment paper and rolled it out with a french pin. For three crusts, this probably saved me half-an-hour’s work.
The second tricky part of my old process was getting the dough on to the grill. The double parchment made this easy too. I simply placed the dough, paper and all, on a preheated plancha (with the grill at about 500 F), thus avoiding the treacherous “commit and flip” ritual. After a minute or so, I used a spatula to flip the dough, and one sheet of the paper came right off. I sprayed the dough with olive oil at this point, and after another minute flipped again, removed the other paper and sprayed that side as well. Then it was a simple matter of turning the dough occasionally as it baked, until one side had been grilled for three to four minutes and the other side for two to three.
At that point, we topped the side that had been cooked longest, and put the pizza back on the plancha for another two or three minutes to finish. If we had been using toppings that required more thorough cooking (sausage or whatever) we would have par-cooked those in a pan ahead of time.
This process was a lot less hassle than what I was doing before, and it avoided the problem of the crusts getting a little too charred from being directly over the flames.
I used a cast iron plancha on the Weber Genesis, but if you’re cooking over charcoal, you could use any heavy pan or a pizza stone. Just be sure to get everything up to a high temperature before you start cooking.
Do you cook pizza outdoors? I’d love to hear about your recipes and process. Leave a note in the comments.